Imagine your students racing against the clock, hearts pounding, minds buzzing, as they crack codes, solve riddles, and unlock secrets, all while learning. Educational escape games are more than just fun: they’re powerful pedagogical tools that turn passive learners into active problem-solvers.
Whether you’re teaching languages, mathematics, history, or cultural studies, escape games can breathe new life into your classroom. They promote teamwork, critical thinking, and engagement like few other methods. Better yet? You don’t need to be a game designer to get started.
This article will briefly walk you through the process of creating your own educational escape game. If you want to learn more and find ready-to-use materials, visit the SpeakER Erasmus+ Project website.

Step 1: Define Your Goals
Before jumping into puzzles and props, ask yourself:
- What is the purpose of the escape game? Is it to review content, introduce a new topic, or assess learning?
- Which topic or chapter will you focus on?
- Which language or academic skills should be developed?
- What transversal (soft) skills do you want to promote? Think collaboration, creativity, or critical thinking.
- What knowledge will students gain? This could be vocabulary, historical facts, grammar points, or cultural references.
Step 2: Set the Practicalities
To avoid chaos, sort out the following:
- Group size & age: Tailor the complexity of the enigmas to your learners’ age and level.
- Duration: Aim for 45-60 minutes of gameplay.
- Format: Choose a format that works for your space and resources:
- Escape box
- Breakout cards
- Virtual escape room
- Room-scale game
- Inclusion: Adapt content for students with specific needs.
- Materials available: What do you already have? Printer? Locks? Digital tools?
Step 3: Design the Scenario
Your escape game needs a compelling story. Choose:
- A time and place (past, present, future? A real-world or fantasy setting?)
- A general theme (espionage, treasure hunt, historical mystery, etc.)
- Characters (optional, but helpful for immersion)
- Cultural elements (especially useful in language games—think local cuisine, traditions, or famous figures)
Pro tip: Use the theme to shape your enigmas and materials. For example, clues in an Ancient Egypt game could be written on scrolls or hidden in “pyramid stones.”
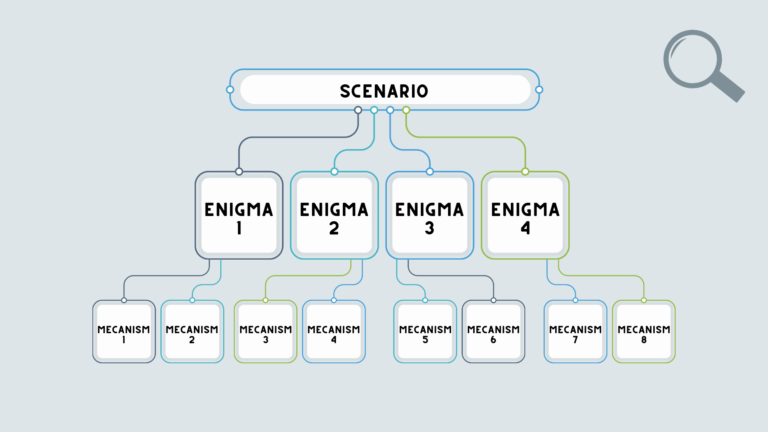
Step 4: Build the Game Structure
An escape game is built on three core elements:
- Mechanisms – basic actions (e.g., entering a code, matching items)
- Enigmas – sets of clues/mechanisms that lead to a solution
- Scenario – the narrative structure that links the enigmas
Start by choosing your game flow:
- Linear: Solve enigmas one after the other.
- Non-linear: Multiple enigmas can be solved in parallel.
- Mixed: A combination of both.
Draw a diagram or flowchart of your escape game to visualize progress and check coherence. This diagram illustrates a non linear game structure.
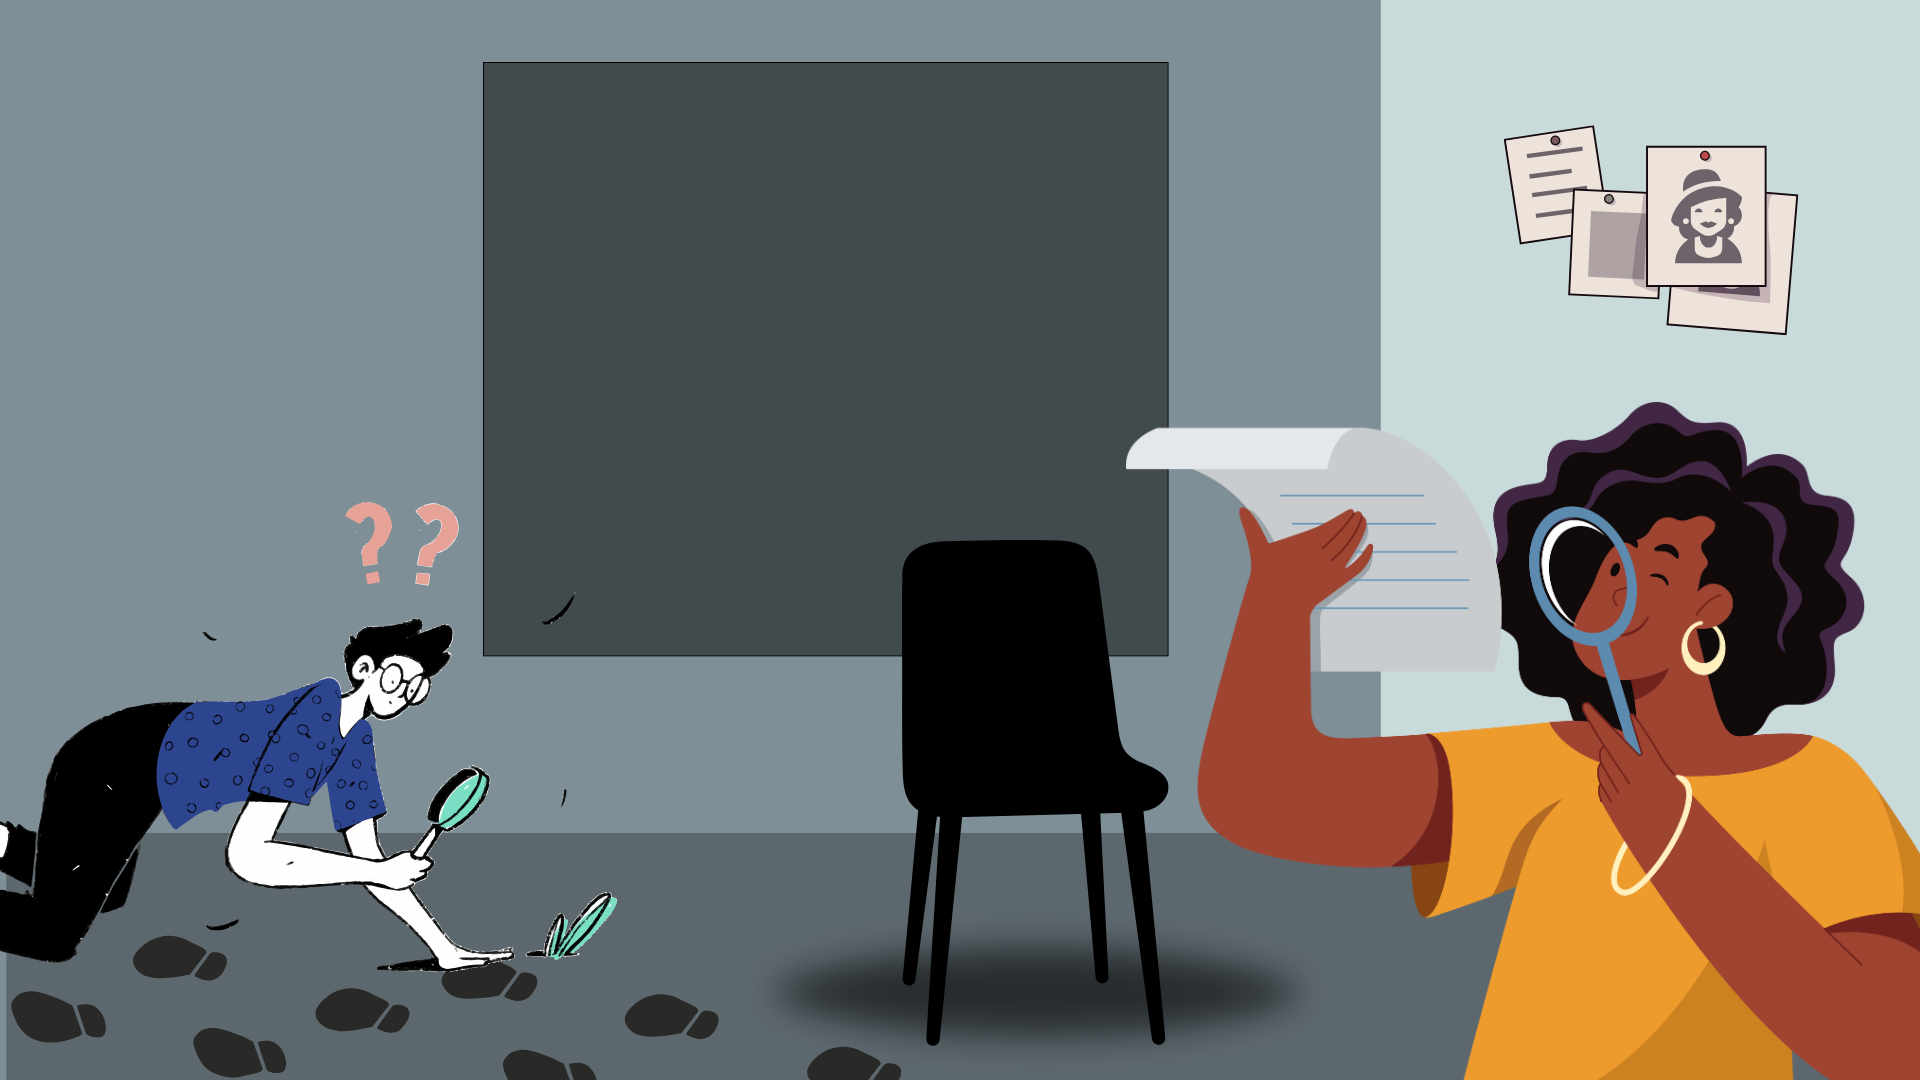
Step 5: Create the Enigmas
Now for the fun part!
- Design 3–6 enigmas, depending on the length and difficulty.
- Use tools such as invisible ink, puzzles, audio clues, QR codes, or jigsaw pieces.
- Link each enigma to a specific learning objective.
- Think of how students will access the clues (hidden under tables, via online links, embedded in props…).
- Plan for collaboration—some enigmas can require 2–3 people to solve together.
Important: Test each enigma separately and as part of the full game to ensure logic, feasibility, and playability.
Step 6: Prepare the Classroom & Your Role
- Setup: Create separate zones if multiple groups will play simultaneously. Use tape, signs, or furniture to define spaces.
- Game Master Role: Decide how you will provide hints. Will you give them aloud, by written notes, or with a tablet? Plan how you’ll track progress (using a roadmap and track form).
- Ambience: Decor, music, props, and costumes go a long way in boosting immersion.
Step 7: Test, Debug, Repeat
Test with colleagues or a small group first. Evaluate:
- Timing
- Flow
- Difficulty
- Engagement
- Achievement of learning goals
Be prepared to adjust! You’ll rarely get it perfect on the first try.
Step 8: Debrief and Reflect
End the game with a structured debrief:
- What went well?
- What was challenging?
- What did students learn?
- What role did each player take?
You can also use a questionnaire for more detailed feedback.
Ready to Dive In?
Escape games aren’t just for fun—they can enhance mastery of any subject, from languages to math (crack the code to open the lock!) to history (unravel a historical conspiracy) or science (solve a lab mystery). They can also integrate cultural heritage or cross-curricular themes.
Need inspiration, templates or ready-to-use puzzles? Check out the fantastic resources on the SpeakER project website, which include tool sheets, diagrams, and examples adapted for language education and beyond.
This article was based on the Erasmus+ project SpeakER’s Conception framework .